How to Start Organic Fertilizer Production at Home?
Starting organic fertilizer production at home can be a rewarding journey. It offers numerous benefits, including sustainable gardening and reduced waste. Many people struggle with the process at first. It may seem complicated, but it's simpler than it appears.
Organic fertilizer production relies on natural materials. You can use kitchen scraps, yard waste, and other organic materials. Proper knowledge is key. You’ll need to understand the right ratios and conditions for decomposition. This can involve some experimentation. Not all batches will turn out perfectly, and that’s part of the learning curve.
Using an organic approach encourages healthier soil. It boosts plant growth without harmful chemicals. While the initial setup may require effort, the long-term benefits are significant. Engaging in organic fertilizer production connects you to nature and enhances your gardening experience. Remember, every successful gardener started somewhere, often with mistakes and adjustments along the way.
Understanding the Basics of Organic Fertilizer Production
Organic fertilizer production is gaining popularity among eco-conscious gardeners. Understanding the basics is crucial for successful home production. Organic fertilizers improve soil quality and stimulate plant growth, making them a preferred choice for many.
According to a report by Grand View Research, the global organic fertilizer market is projected to reach $12.4 billion by 2028, highlighting a growing demand for sustainable farming practices.
Starting at home requires a few essential materials. Composting kitchen scraps and yard waste is the foundation. Use nitrogen-rich greens like vegetable scraps and carbon-rich browns like dried leaves.
Maintaining a balanced ratio is vital; 60% carbon to 40% nitrogen is generally optimal. However, many beginners often add too much nitrogen, resulting in odor issues.
Monitor moisture levels, as damp conditions can attract pests. A study from the Soil Science Society shows that incorporating organic matter can improve soil health, but improper management can lead to nutrient imbalances.
Though it seems straightforward, challenges can arise. Some may find it difficult to turn their compost regularly, leading to slow breakdown. Others might struggle with odors, primarily due to overwatering or excess nitrogen. Testing the compost to ensure balance can highlight deficiencies. Regularly evaluating the process is necessary for overcoming these hurdles. With time, the learning curve becomes easier as you refine your method.
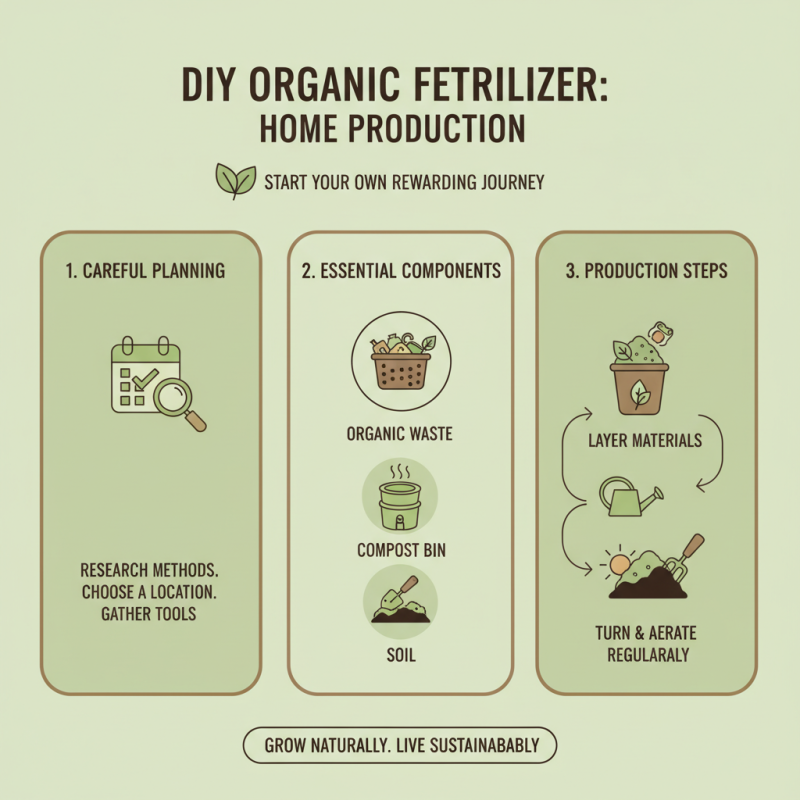
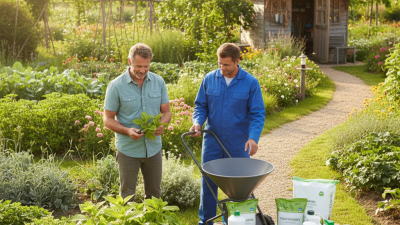
Gathering Essential Materials for Home Production
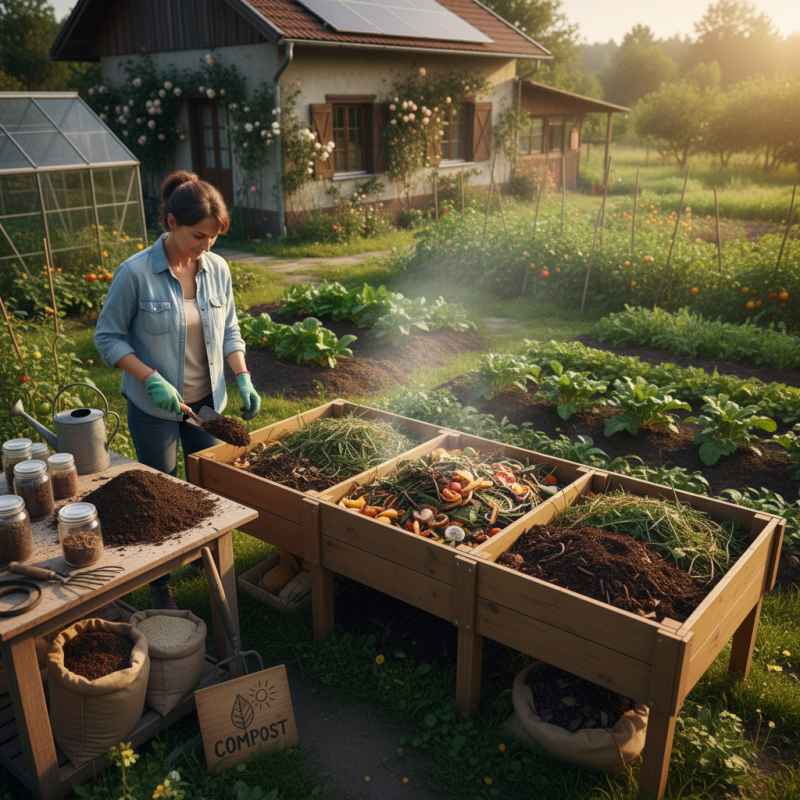
Starting your own organic fertilizer production at home can be rewarding. It requires careful planning and the right materials. Gathering essential components is crucial for a successful venture. You will need organic waste, a compost bin, and some soil.
Organic waste includes kitchen scraps. Fruit peels, vegetable leftovers, and coffee grounds are excellent choices. Avoid adding meats or dairy, as they can attract pests. A compost bin can be as simple as a sealed container. Ensure it has proper ventilation for airflow. Don't forget soil, which helps with the decomposition process.
Consider the balance of carbon and nitrogen. Use brown materials like dried leaves or cardboard. Green materials, like grass clippings or green plant cuttings, provide nitrogen. Achieving the right mix takes practice. You may need to experiment with different ratios. Over time, you'll learn what works best in your environment. Remember to turn your compost regularly. This helps speed up the process and reduces odors. Be patient; the transformation won’t happen overnight.
Step-by-Step Guide to Composting Organic Waste
Composting organic waste at home is a rewarding process. It allows you to recycle kitchen scraps and yard debris into valuable fertilizer. According to the EPA, about 30% of what we throw away is food waste. By composting, you can significantly reduce this figure.
Start by gathering organic materials like vegetable peels, coffee grounds, and grass clippings. Keep a balance between green (nitrogen-rich) and brown (carbon-rich) materials. Ideally, aim for a ratio of 2:1. However, achieving this balance can be tricky. You might find that your compost is too dry or too wet. Adjusting the moisture levels requires careful observation.
Over time, microorganisms break down the waste, creating nutrient-rich compost. This process can take several months, but it's often longer than expected. It's important to turn the pile regularly to aerate it. When the compost is ready, it should look dark and crumbly. However, you might still find some recognizable pieces. This isn't a failure—it's part of the process. Monitoring the composting conditions will help you improve your production over time.
Methods for Brewing Organic Liquid Fertilizers
Brewing organic liquid fertilizers at home is a rewarding process. You can create nutrient-rich solutions from kitchen scraps and garden waste. Simple methods yield effective results. One popular method involves using compost tea. To make it, simply steep well-aged compost in water for a few days. The nutrients will leach into the water, creating a potent liquid fertilizer.
Another effective option is fermenting plant materials. Gather items like nettles or comfrey. Cut them into small pieces and place them in a container. Cover them with water and let it ferment for a couple of weeks. This will create a nutrient-dense liquid. Be cautious of odors during fermentation; ensure proper ventilation.
Tips: Pay attention to the materials you use. Some plants can have strong effects. Start with small amounts to test their impact on your plants. Also, always dilute your liquid fertilizers before applying them. This prevents plant burn and ensures your garden thrives without overdoing it. A little trial and error will lead to success. Enjoy the journey of becoming an organic gardener!
Tips for Applying and Storing Homemade Organic Fertilizers
When creating homemade organic fertilizers, proper application and storage are crucial for effectiveness. For applying, consider your plants’ needs. Different plants require different nutrient levels. A general rule is to apply fertilizers during the growing season. Mix the fertilizer into the soil to ensure better absorption. Watch your plants closely. Over-fertilization can cause damage. Guesswork and experimentation often lead to mistakes, but that’s part of the learning process.
Storing homemade organic fertilizers is equally important. Keep them in airtight containers to maintain their potency. Moisture can spoil the mix, so store them in a dry, cool place. Label each container clearly to avoid confusion. Using clear jars can help you see the contents easily. Remember, some nutrients may degrade over time, affecting their effectiveness. Regularly check for any signs of spoilage. It’s essential to reflect on what works and what doesn’t, adjusting your methods as you learn more about your plants' responses.
Homemade Organic Fertilizer Production: Nutrient Comparison